I adore kitchen appliances. I got a Sunbeam Pie Maker last Christmas, and really like it.
You need some pie crust and some filling. You can make it yourself, but for demonstration purposes, I chose the prepackaged route. Thanks Kroger!
Heat the Pie Maker.
Roll out the dough and cut it with the crust cutter.
Use the smoosher to push it down into the bottom crust well.
Put your desired filling in those crusts and cover with the mini pie crust tops.
Bake for 10 minutes and Viola! Little cute mini peach pies!
For the filling you can use any fruit or meat kind you can think of. I
have read that people have had success with custard-y pies as well, such
as pumpkin, but I haven't tried that yet. I have tried meaty leftover chili, chicken n dumplings, and put some pizza sauce, Italian sausage, pepperoni, and mozzarella in them for mini pizzas.
wallstreet patina
Sunday, March 11, 2012
Strawberry Preserves
I will never buy strawberry preserves at the store again.
I have never ever canned anything in my life and didn't want to invest in some of the fancy pants items they have specifically for canning, so I improvised with some things. It all worked out in the end. After doing this, I can see how those items would make life easier, and will probably invest in them in the future. The biggest problem I have with that actually would be where to store them. But I digress....
If you were scared like me to try something like this-don't be. It was fun and relatively simple. The most time consuming thing was hulling the berries.
Strawberry Preserves
Get a pot of water simmering and put the jars in it. Also, get a shallow pan simmering for the lids too. I used a frying pan.
Hull the berries and slice.
Squeeze the lemons in a pan using a colander to catch the seeds.
Pour all the sugar in the pan with the lemon juice. Cook them on medium heat until the sugar melts. This happens really fast. I was stirring and thinking it would never happen. One second it is grainy and the next its ready!
Now add the berries. Keep them stirred and sorta mash them as you are stirring. Cook this until it reaches 220 degrees. Again, it seemed to take a while for it all to heat up, then 220 came real fast so watch out. While this is going on, try and get the jars out of the simmering water.
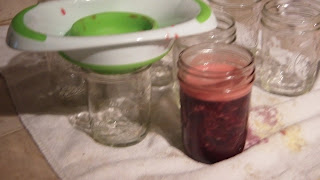
Ladle into the jars, leaving a little bit of space for the preserves to expand and contract. I did invest in a funnel and I'm glad I did. There would have been a big old mess had I not.
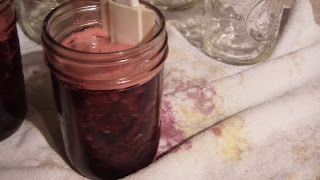
After you have the jars filled, take a rubber spatula and go around the sides of the jars to release the air bubbles.
Put the lids and rings on and put them into the simmering pot. Make sure the water level is about an inch above the jars. Bring this up to a boil for 15 minutes. Instead of one of those canning racks, I used a craw fish boil thing (I don't know the official name of this) to put the jars in so I could pull them out together. I also used plastic coated high temperature gloves to handle them after processing. Hooray for improvisation.
Pull the jars out and let them sit for about 12 hours. Then screw the lids tighter and give them away or put them in the pantry for later. They will be good for up to a year. Enjoy!
I have never ever canned anything in my life and didn't want to invest in some of the fancy pants items they have specifically for canning, so I improvised with some things. It all worked out in the end. After doing this, I can see how those items would make life easier, and will probably invest in them in the future. The biggest problem I have with that actually would be where to store them. But I digress....
If you were scared like me to try something like this-don't be. It was fun and relatively simple. The most time consuming thing was hulling the berries.
Strawberry Preserves
- 2 pounds strawberries
- Juice of 2 big lemons
- 4 cups of sugar
Get a pot of water simmering and put the jars in it. Also, get a shallow pan simmering for the lids too. I used a frying pan.
Hull the berries and slice.
Squeeze the lemons in a pan using a colander to catch the seeds.
Pour all the sugar in the pan with the lemon juice. Cook them on medium heat until the sugar melts. This happens really fast. I was stirring and thinking it would never happen. One second it is grainy and the next its ready!
Now add the berries. Keep them stirred and sorta mash them as you are stirring. Cook this until it reaches 220 degrees. Again, it seemed to take a while for it all to heat up, then 220 came real fast so watch out. While this is going on, try and get the jars out of the simmering water.
Ladle into the jars, leaving a little bit of space for the preserves to expand and contract. I did invest in a funnel and I'm glad I did. There would have been a big old mess had I not.
After you have the jars filled, take a rubber spatula and go around the sides of the jars to release the air bubbles.
Put the lids and rings on and put them into the simmering pot. Make sure the water level is about an inch above the jars. Bring this up to a boil for 15 minutes. Instead of one of those canning racks, I used a craw fish boil thing (I don't know the official name of this) to put the jars in so I could pull them out together. I also used plastic coated high temperature gloves to handle them after processing. Hooray for improvisation.
Pull the jars out and let them sit for about 12 hours. Then screw the lids tighter and give them away or put them in the pantry for later. They will be good for up to a year. Enjoy!
Saturday, March 10, 2012
Oreo Balls
Everyone really likes these, especially my son. He wanted them in lieu of a cake for his birthday! I got the recipe from my mother-in-law. The original recipe calls to dip the balls in white chocolate. When I made these the first time, the store was out of white chocolate so I improvised with Vanilla Candy coating. They turned out great!
Oreo Balls
Mix them up with the cream cheese.
Make them into little walnut sized balls and put them on a piece of wax paper on a cookie sheet. Put them in the refrigerator for an hour. (this makes them easier to work with)
After an hour, melt your candy coating in a double boiler or the microwave and start dipping! I find it helpful to use a small spoon and toothpick to dip these babies.
Put them back on the waxed paper and stick them in the refrigerator again until they are set. You could sprinkle things on them like nuts, coconut, or chocolate chips. Or, get artsy with them and drizzle some dark chocolate over them to make them stripey. My son likes them plain, so that's how I make them.
Oreo Balls
- Package of Oreos (store brand is fine)
- 8 oz package of cream cheese, room temperature
- 1 pound of vanilla candy coating
Mix them up with the cream cheese.
Make them into little walnut sized balls and put them on a piece of wax paper on a cookie sheet. Put them in the refrigerator for an hour. (this makes them easier to work with)
After an hour, melt your candy coating in a double boiler or the microwave and start dipping! I find it helpful to use a small spoon and toothpick to dip these babies.
Put them back on the waxed paper and stick them in the refrigerator again until they are set. You could sprinkle things on them like nuts, coconut, or chocolate chips. Or, get artsy with them and drizzle some dark chocolate over them to make them stripey. My son likes them plain, so that's how I make them.
Sweet Strawberry Sauce for Shortcake
We went and picked a bunch of Strawberries and that made me want a Strawberry Shortcake. I realized that I had never used fresh strawberries-I always used the frozen kind bought at the store and that is expensive. So making my own sauce is tastier and cheaper!
Strawberry Sauce
I used angel food cake and cool whip to make my shortcakes...
You probably want to use this within 3 days. I made a bunch up and put it in the freezer for later too.
Strawberry Sauce
- 2 Quarts fresh strawberries, sliced
- 1/2 cup white granulated sugar
I used angel food cake and cool whip to make my shortcakes...
You probably want to use this within 3 days. I made a bunch up and put it in the freezer for later too.
Marvelous Meatloaf
Meatloaf. I haven't ever met a child that likes it, yet most adults think of it as comfort food. I was always on the fence about it. The most off putting thing to me, and also Hubby as I found out, was the ketchup people always seem to slather on the top. Ick.
This is my recipe that I have worked on and you can leave that bottle of Heinz in the fridge.
Marvelous Meatloaf
Combine all the above ingredients, then put in a loaf pan.
Bake for one hour. Pull it out and drain the fat. If the loaf looks 'juicy', bake for another 10 minutes. If it looks firm, pull it out and serve. Unless you like 'juicy' meatloaf, then have at it.
This is my recipe that I have worked on and you can leave that bottle of Heinz in the fridge.
Marvelous Meatloaf
- 2 pounds hamburger meat
- 1 pouch of Lipton Onion Soup Mix
- 1 14 ounce can diced Italian seasoned tomatoes, drained
- 3 slices of bread (chopped)
- 1 egg
Combine all the above ingredients, then put in a loaf pan.
Bake for one hour. Pull it out and drain the fat. If the loaf looks 'juicy', bake for another 10 minutes. If it looks firm, pull it out and serve. Unless you like 'juicy' meatloaf, then have at it.
Subscribe to:
Comments (Atom)


